A pool liner hole feels like a small problem until the water keeps dropping, the patch will not hold, or the liner starts tearing in a second spot. The right answer is not always “patch it” and it is not always “replace the liner.” The real decision is whether the hole is a clean, isolated puncture or a sign that the vinyl has reached the end of its useful life.
Use this guide to make the call before you drain water, buy the wrong patch, or spend a season chasing leaks that keep coming back.
Quick Answer: Patch Small Damage, Replace Failing Vinyl
Patch the liner when the hole is small, clean, and surrounded by flexible vinyl. A puncture from a toy, tool, cleaner, branch, or sharp object can often be repaired underwater with a vinyl patch kit. This is especially true when the liner is newer, the tear is away from stairs and fittings, and the material still feels supple instead of crispy or brittle.
Replace the liner when the hole is part of a pattern. Multiple pinholes, a tear that keeps spreading, cracking above the waterline, damage around the skimmer, returns, light, corners, or stairs, and a liner that is already 8 to 12 years old all point in the same direction: patching may buy time, but it will not reset the liner’s age.
- Patch: one clean hole, small tear, flexible vinyl, enough flat surface for adhesive, no repeated leak history.
- Replace: brittle vinyl, faded and cracking waterline, several leaks, tear at a fitting, water behind the liner, or an old liner that keeps opening up.
- Call a leak pro: water stops at the light, skimmer, return, or step gasket, or the bucket test shows loss but you cannot find a liner puncture.
First, Prove It Is Actually the Liner
Before you decide between a patch and a new liner, confirm that the water loss is coming through the liner. Pool owners often blame the vinyl because it is visible, but leaks also happen at lights, returns, skimmers, step gaskets, plumbing, valves, and the equipment pad.
Start with the bucket test. Fill a bucket with pool water and place it on a step so the water level inside the bucket matches the pool water outside the bucket. Mark both levels, turn off any autofill, and compare the drop after 24 hours. If the pool drops more than the bucket, you are losing water beyond normal evaporation.
Then watch where the pool stops dropping. If the level settles near the bottom of the skimmer, a return, a light niche, or a step faceplate, do not assume the liner fabric is the failure. Those fittings have gaskets, screws, seals, and conduits that can leak even when the vinyl sheet looks fine.
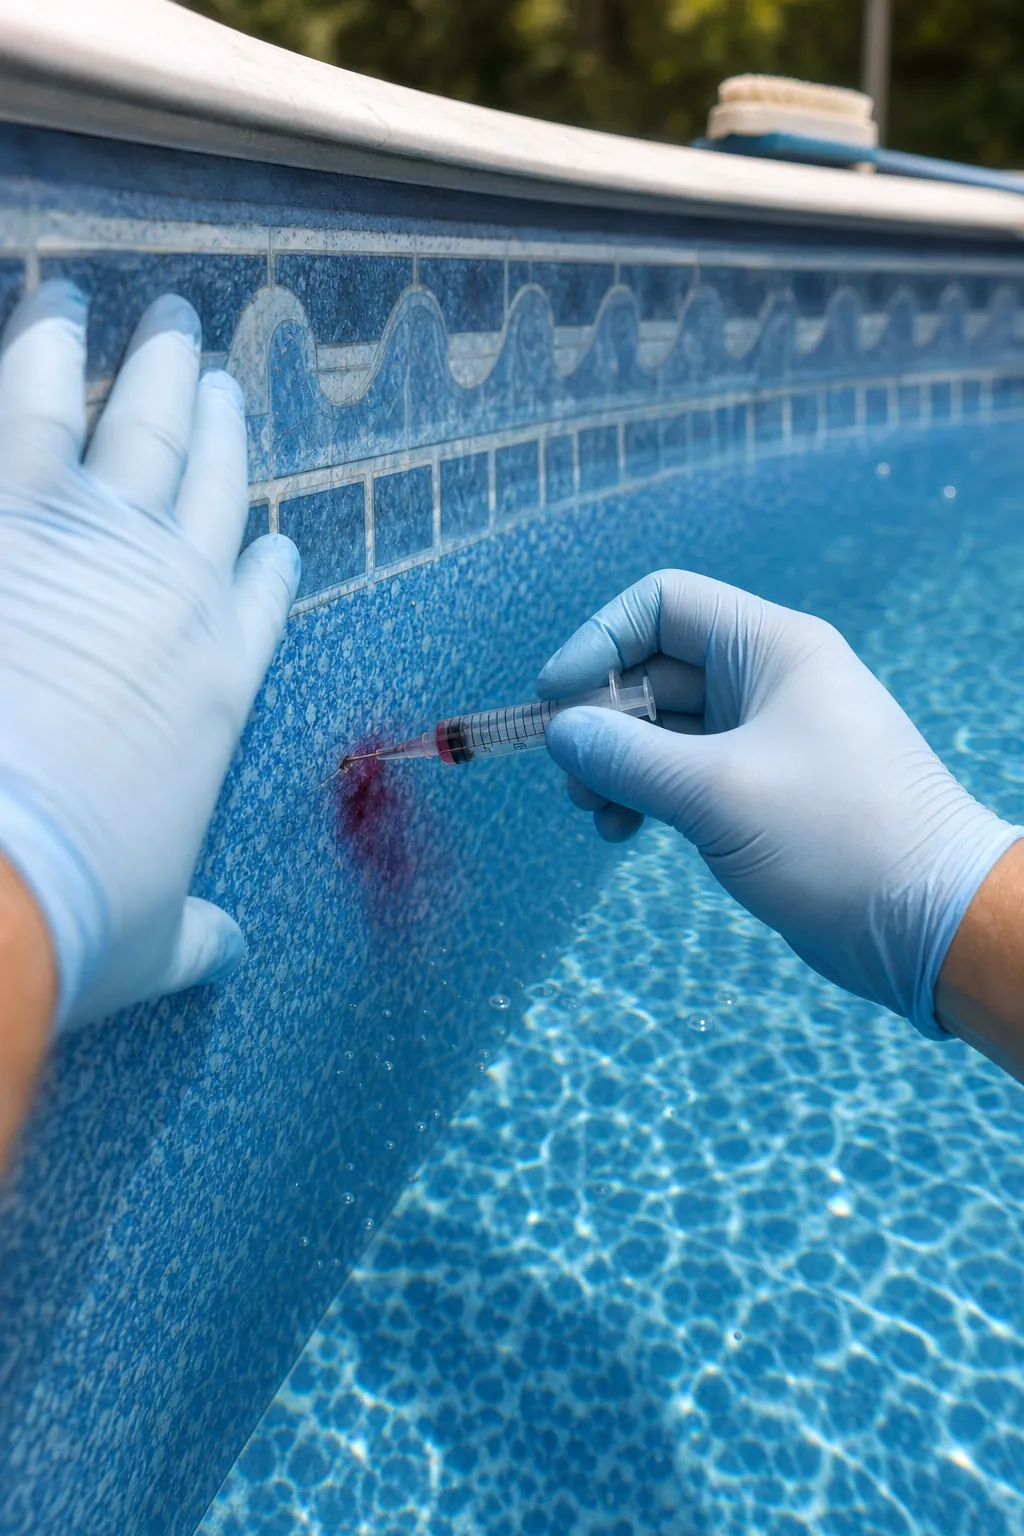
If you suspect a small liner hole, do a calm-water dye test with the pump off. Move slowly near the suspected spot and release a small amount of leak detection dye or food coloring. If the dye pulls into a point, you found active water movement. If it drifts randomly, keep looking instead of smearing adhesive over a guess.
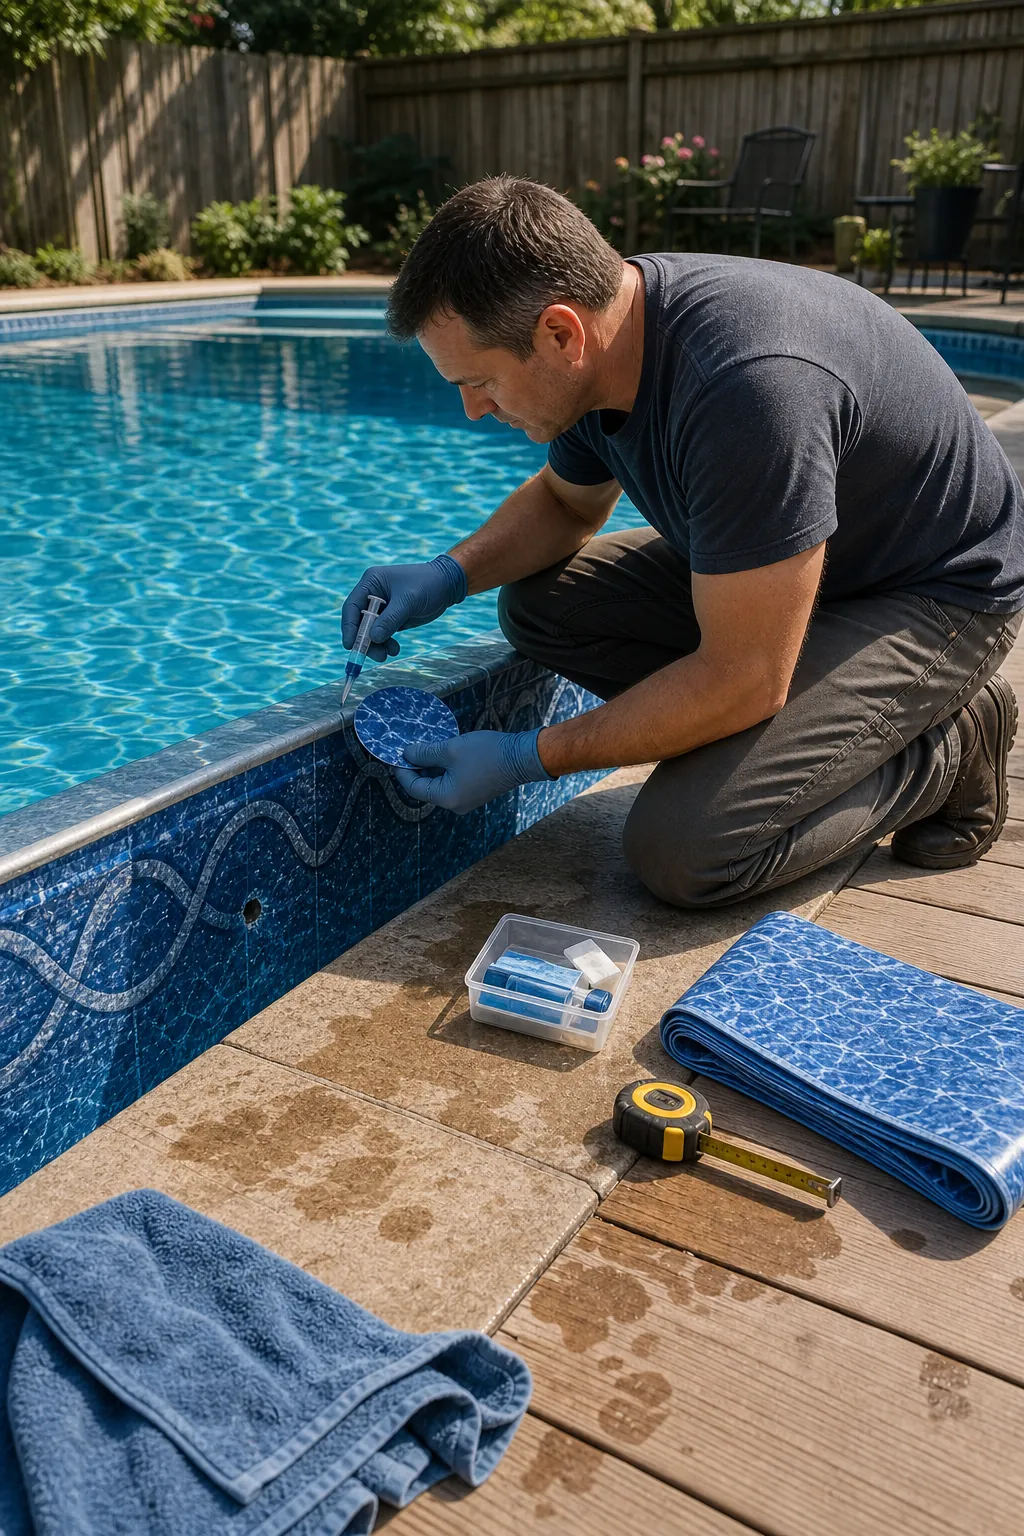
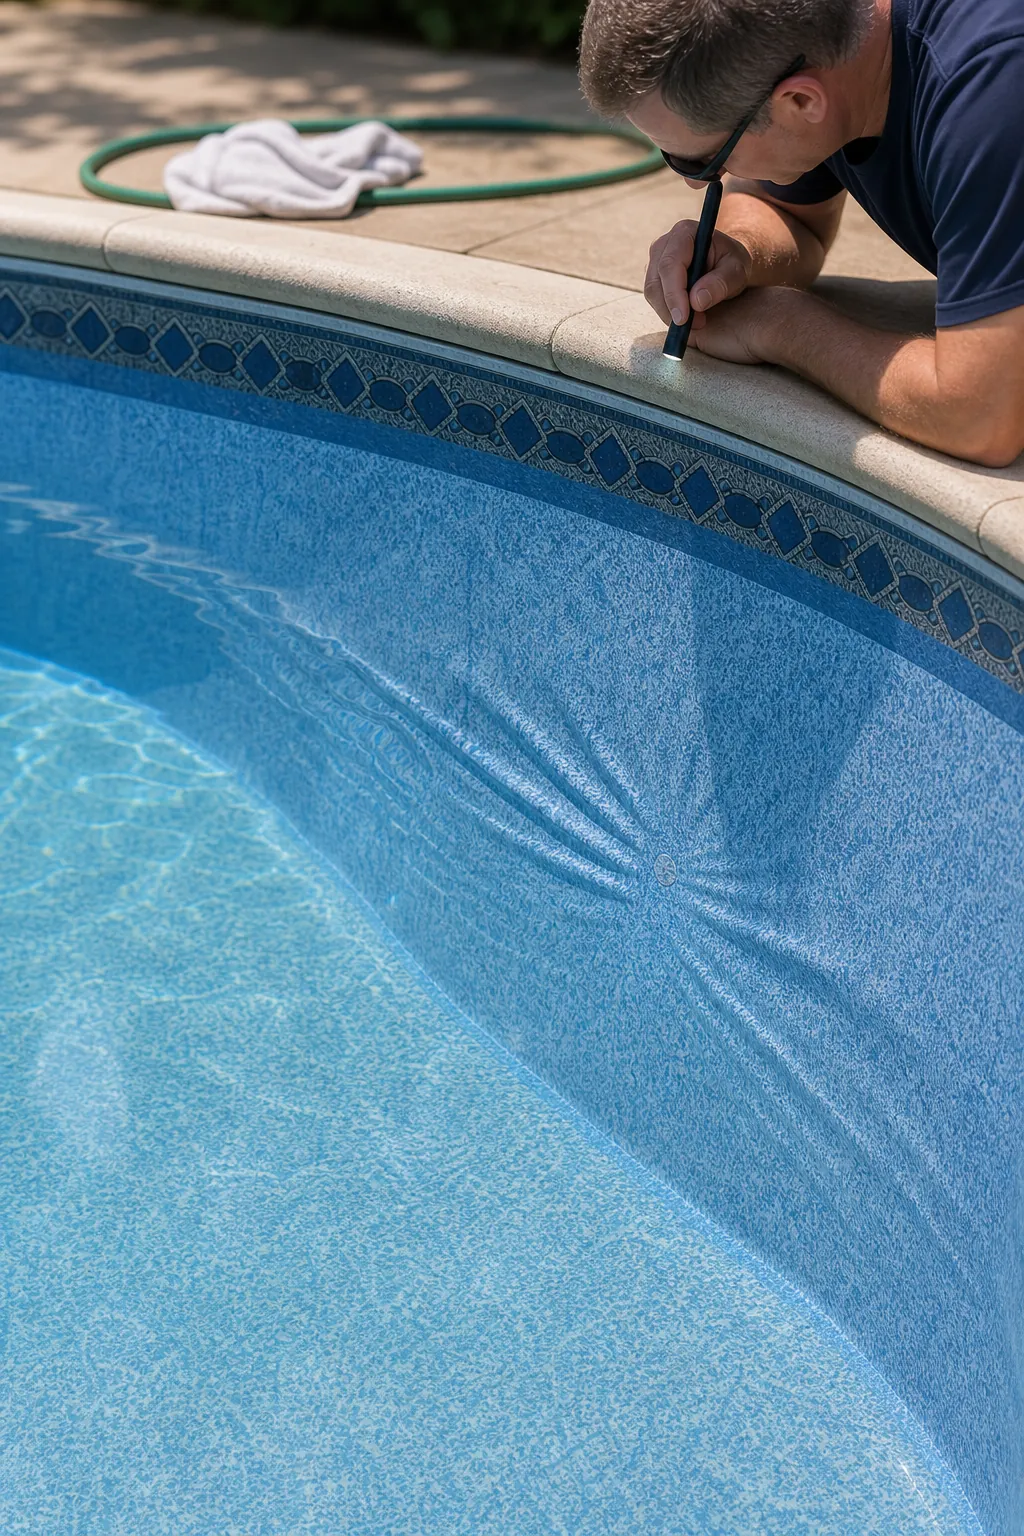
Patch It When the Hole Has a Clear Cause
A patch is the right first move when the damage has a believable cause: a dropped pole, a sharp pool toy, a cleaner that snagged, a branch after a storm, or a small puncture on the floor or wall. In that case, the liner is not necessarily failing. It was injured.
The best patch candidates have four things in common: the hole is small, the surrounding vinyl is smooth, the area is not under heavy stretch, and there is enough clean vinyl around the damage for the patch to bond. A patch needs healthy material to grab. If the vinyl tears as you clean it or the edge keeps splitting, the patch is being asked to hold back a larger failure.
Underwater patch kits can work well for below-waterline holes. In many vinyl pools, keeping the pool filled is safer than draining it just to make the repair dry. Water supports the liner, helps keep it seated, and reduces the risk of shrinkage, wrinkles, wall movement, or groundwater pressure problems.
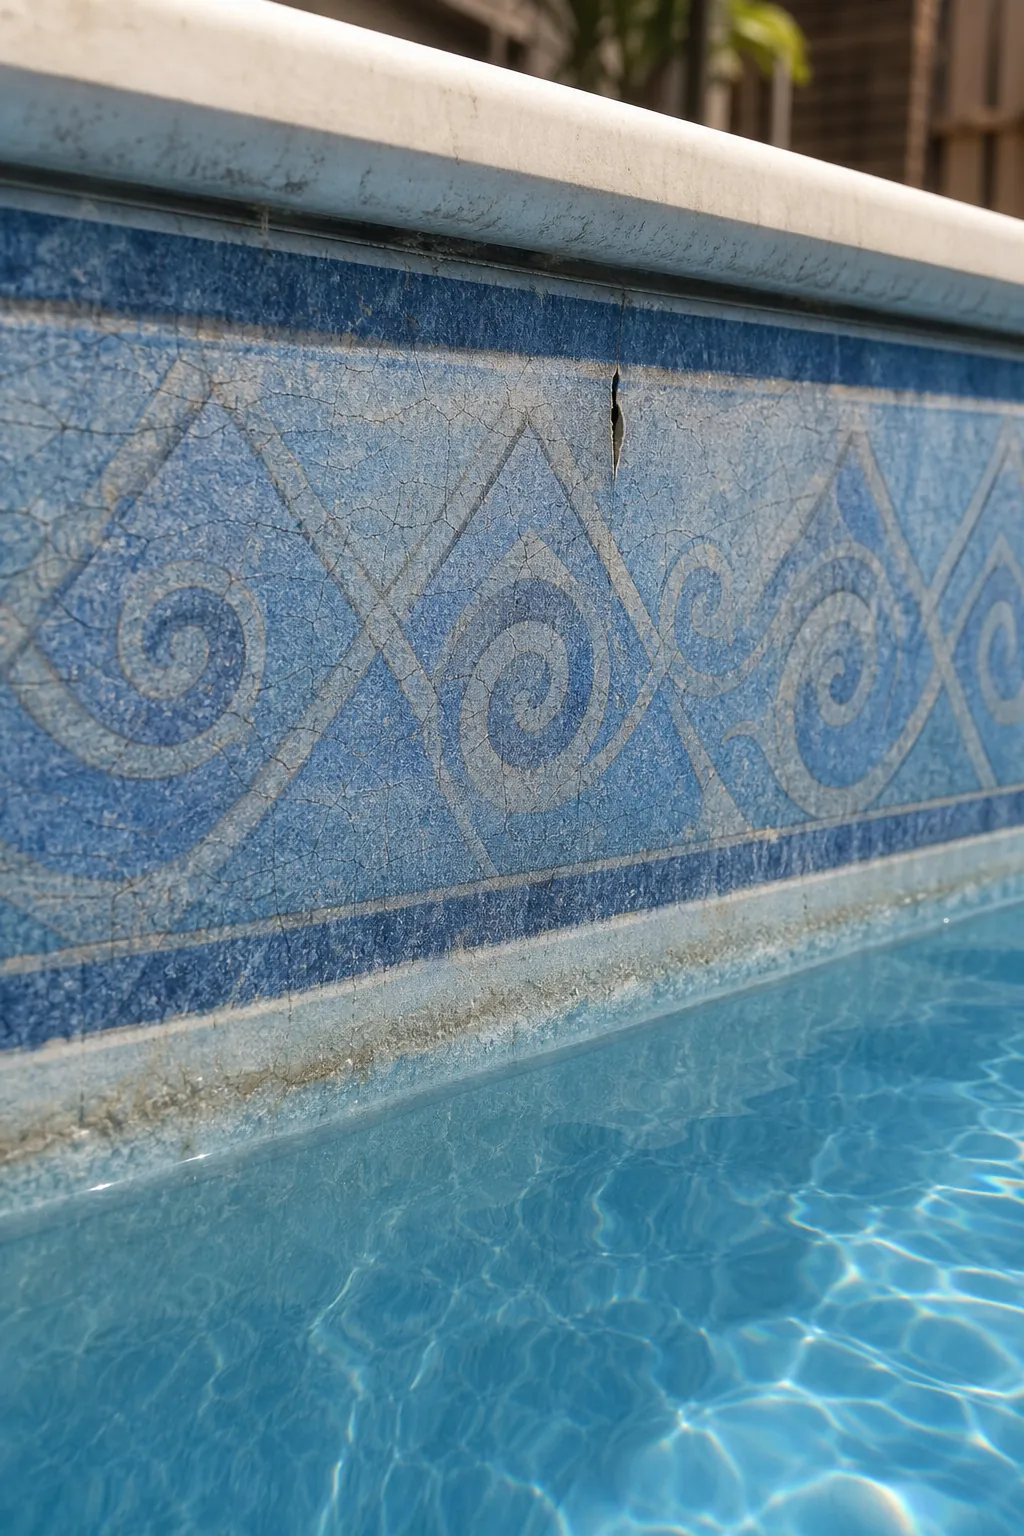
Replace It When the Vinyl Is Telling on Itself
A liner hole is more serious when it appears without a clear puncture event. Sun, age, poor water balance, chemical abuse, low water exposure, groundwater movement, and installation stress can all weaken vinyl. Once the material loses elasticity, a patch becomes a temporary bandage on aging plastic.
Cracking above the waterline is one of the clearest replacement signs. That area gets more direct UV exposure and less water support. If it looks faded, dry, rough, or split, expect new tears to appear as the season goes on. A patch may stop one leak, but it will not make the sun-damaged section flexible again.
Be especially skeptical of holes near stairs, corners, bead track, skimmer openings, returns, lights, and main drains. These are high-stress or high-detail areas. The vinyl may be stretched, folded, screwed under a faceplate, or pulled around a tight shape. If the patch cannot overlap healthy vinyl on every side, it has little chance of becoming a durable repair.
Also look at history. One small patch on a 4-year-old liner is normal. Five patches on a 12-year-old liner is a message. When pool owners on forums talk about losing whole weekends to repeated dye testing, refilling, and re-patching, the pattern is usually the same: they are no longer fixing one hole. They are managing a liner that is aging out.
How to Make a Patch That Has a Fair Chance
If the liner passes the patch test, do the repair deliberately. Most failed patches are not mysterious. They are too small, too square, applied to a dirty surface, pressed unevenly, or placed over vinyl that is still being pulled apart.
- Find the exact leak first. Do not patch a stain, shadow, or random wrinkle unless dye confirms water movement.
- Clean the area. Remove slime, oils, algae, and loose debris. A patch cannot bond to sunscreen residue or scale.
- Cut the patch round or oval. Corners peel. Round edges stay down better.
- Make it larger than the damage. Give the adhesive real overlap, especially if the tear is longer than a pinhole.
- Use vinyl liner adhesive, not random tape. Peel-and-stick products can help in a pinch, but glue-and-vinyl patches usually give a stronger repair.
- Press from the center outward. Push out air bubbles and work the edges several times while the adhesive sets.
For an underwater patch, many kits call for applying adhesive to the patch, folding it glue-side-in while you move through the water, then unfolding it directly over the hole. Follow the kit directions, because adhesive behavior varies. After the patch is on, keep pressure on it, smooth the edges, and avoid brushing or vacuuming that spot until it has had time to cure.
Fittings Change the Decision
A hole near a faceplate is not the same as a hole in the middle of the wall. Skimmers, returns, steps, and lights concentrate stress and create leak paths that are not always visible from the pool side. Water can move behind a fitting, behind the liner, or into a conduit while the patch itself looks fine.
If the water level repeatedly stops at the same fitting height, treat that as evidence. A light niche, return gasket, skimmer throat, or step gasket may need a gasket repair, sealing work, pressure testing, or liner replacement during a proper fitting rebuild. Patching the vinyl beside a failing fitting can waste time because it misses the leak path.
This is where professional leak detection can be worth the fee. A technician can dye test fittings, pressure test lines, and use equipment that finds small liner holes you may never see by eye. That matters when the replacement decision is expensive. You want to know whether you have a $25 patch, a gasket leak, a pipe issue, or a liner that is truly done.
Do Not Drain a Vinyl Pool Blindly
It is tempting to drain below the hole so you can work dry. Sometimes lowering the water a little is reasonable. Emptying a vinyl pool without a plan is different.
Water is part of what holds a vinyl liner in place. Remove too much and the liner can shrink, wrinkle, pull from the track, or become harder to reset. In some conditions, groundwater pressure can also push against an under-supported pool. Above-ground pools have their own risk: the frame and wall system may not like being emptied and left exposed.
If a patch kit says it can be used underwater, use that advantage. If the repair requires lowering water more than a small amount, especially on an older liner, get local advice first. The cost of a service call is easier to accept than turning a patchable hole into a wrinkled, shrunken liner.
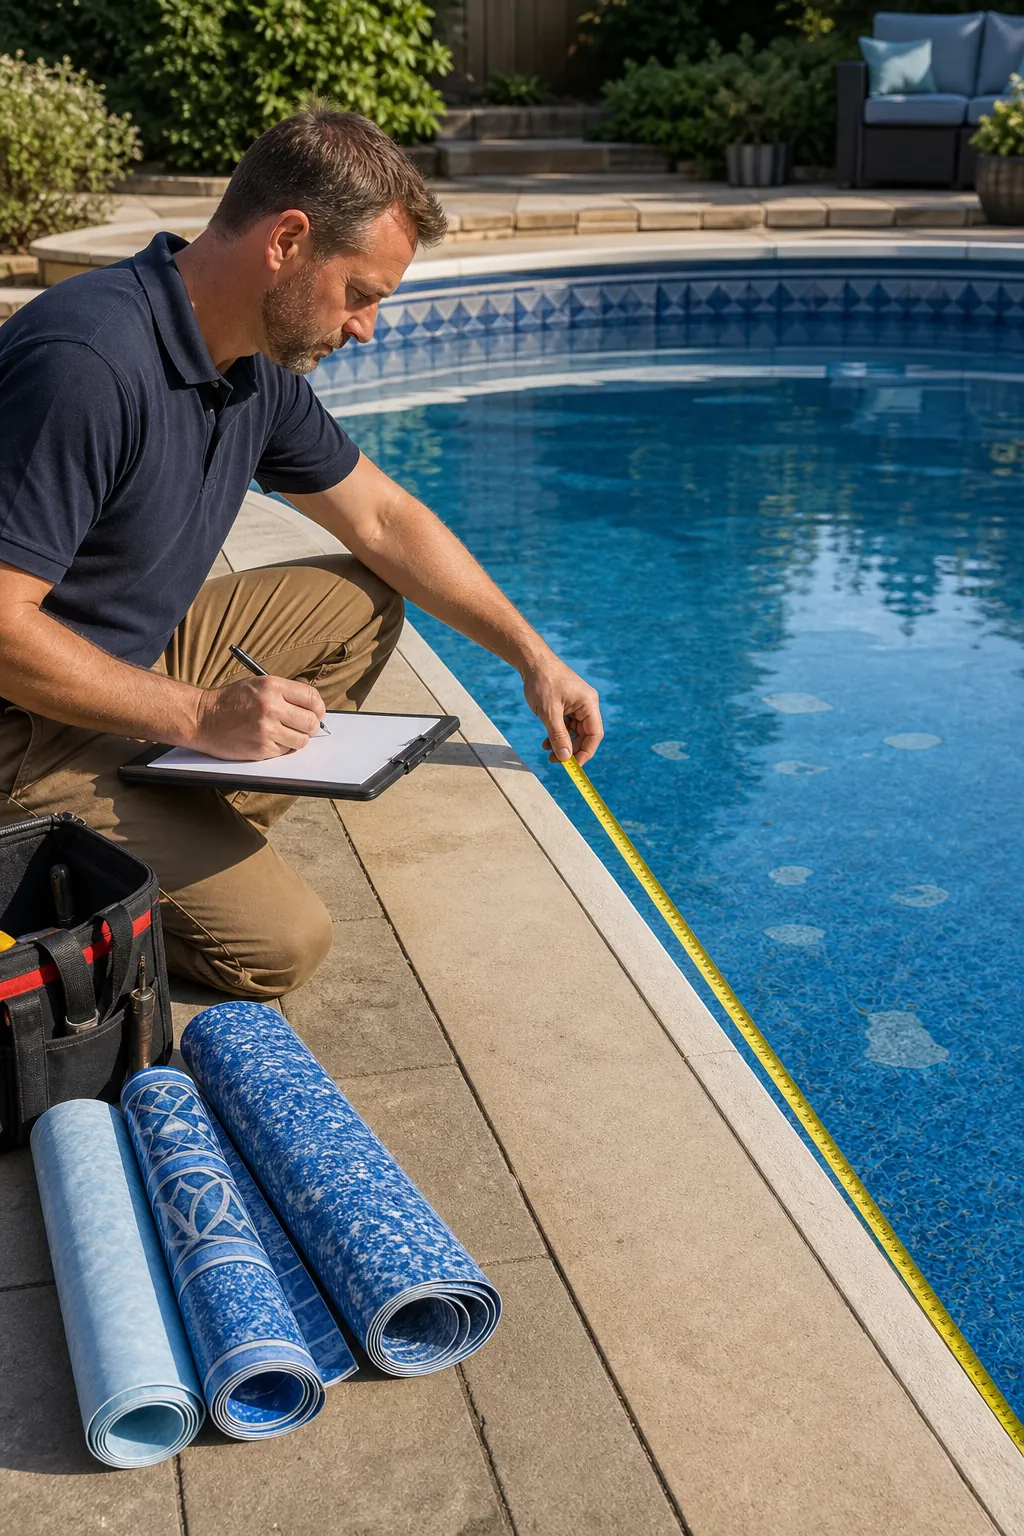
The Money Question: Patch Now or Replace Before It Gets Worse?
A DIY patch kit is cheap. A replacement liner is not. That is why the emotional answer is often “try one more patch.” Sometimes that is smart. A good patch can carry a healthy liner through many more seasons.
The mistake is using patch cost as the only measurement. Add the hidden costs: refilling water, balancing chemicals again, higher water bills, possible washout behind the liner, missed swim time, repeated leak detection, and the risk that a small tear becomes a large tear. If the liner is already near replacement age and the damage is spreading, the expensive-looking option may be the cleaner decision.
If replacement is likely but not urgent, patch the leak to protect the pool and start getting quotes early. Liner installers book up when warm weather arrives. Waiting until the patch fails in peak season can leave you with fewer pattern choices, longer delays, and more pressure to accept the first available price.
Final Decision Checklist
Patch the liner if most of these are true:
- The leak is confirmed with dye.
- The hole or tear is small and isolated.
- The liner is still flexible around the damage.
- The damage is away from stairs, corners, seams, lights, skimmers, and returns.
- You have enough clean vinyl for a generous round or oval patch.
Replace the liner if most of these are true:
- The liner is brittle, faded, cracking, or rough at the waterline.
- There are multiple leaks or a history of recurring patches.
- The tear keeps growing after cleaning or patching.
- The damage is at a fitting, stair, corner, or high-stress area.
- Water has gotten behind the liner and the liner is old enough that resetting it may not be reliable.
The cleanest rule is this: patch a known accident, replace a failing material. A small puncture in healthy vinyl deserves a careful repair. A brittle liner that keeps making new holes is asking for a planned replacement, not another weekend of guessing.